Perfect Manicures: The Essentials

I love a good manicure. There is nothing better than a fresh mani in the perfect color (and nothing worse than picking a bad polish). For years I was a huge fan of dark shades in the deep red and plum families. I still love those colors, but I always find dark colors chip faster and the chipping is much more noticeable. Dark colors also take longer to dry because they are more pigmented which leaves you at greater risk of smudging too. For the past 6 months or so I have gravitated towards pretty neutrals. Lighter shades are also easier to apply yourself for the perfect at home manicure. I find Essie polishes to be thinner than OPI polishes which makes for faster dry time. Here are my favorite Essie polishes that I think everyone should have in their collection.

Good to Go

Everyone NEEDS this quick dry polish in their collection. It dries your polish super fast and gives it a great shine. This polish costs $10, but is totally worth the splurge. I bring this with me to my nail salon and ask them to use it as my top coat. Most nail salons will charge extra for a quick dry polish. I usually keep a bottle of this polish at home and in my bag for spur of the moment mani/pedis.

Protein Base Coat

Although I am only in my mid twenties, I have noticed my nail beds becoming dry and slightly ridged. When I do my own nails I use this base coat to strengthen and smooth out my nails. It is a bit opaque which seems to serve as a good base for your polish (kind of like an eye shadow primer).

SAM_5020

Favorite Light Shades

Shop Till I Drop – A sheer coral

Spaghetti Strap – A light bubble gum pink

Vanity Fairest – A light pink/white with a touch of shimmer

East Hampton Cottage – A light, shimmery white with a touch of pink

Ballet Slippers – A very pale pink; good for French manicures

Sand Tropez – (Not pictured) A light beige with a hint of lilac and grey

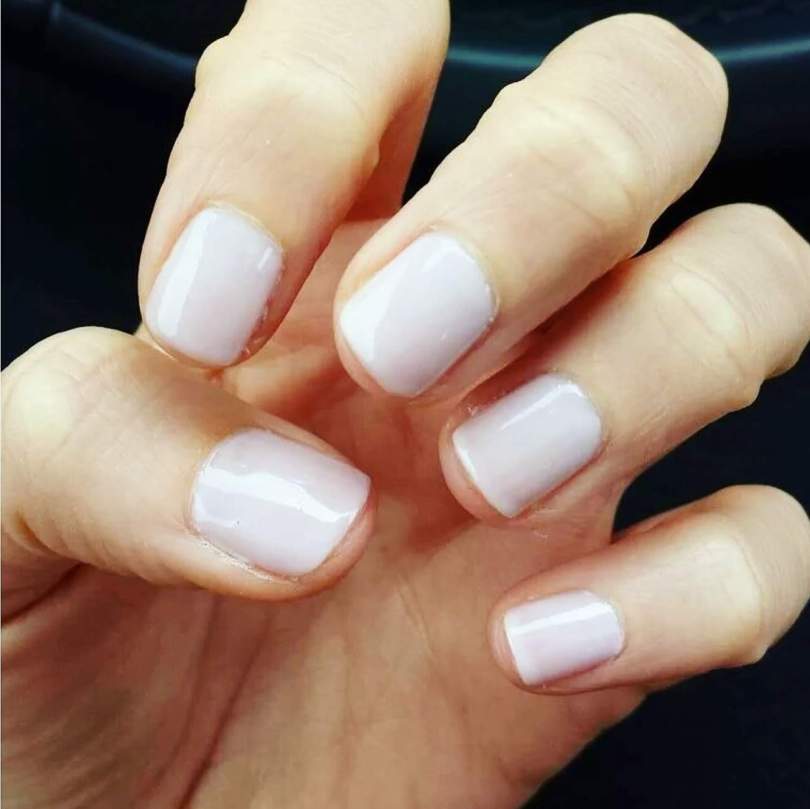
Hubby for Dessert – (Pictured Below) A beautiful sheer lilac

Chiffon My Mind – OPI (Not pictured) A pearly semi-sheer white

DIY Mani/Pedi Tips

I love getting my nails done. Sometimes I don’t have the time to stop at the salon or when I am trying to watch my spending I skip salon manicures. Here are a few tips for a great DIY mani/pedi.

  1. Do not leave your nail polish on for longer than a week.
  2. Regularly moisturize your hands and cuticles. I love using extra virgin organic coconut oil and OPI Avojuice lotion. I keep both on my desk at work.
  3. Do not cut your cuticles regularly. Cutting causes your cuticles to become thick. Instead, keep them moisturized and push them back. I will get my cuticles cut once a month or once every other month.
  4. Use a nail file more than a nail clipper. As my nails have gotten more dry, they have also become a bit weak. I find that nail clippers sometimes put too much pressure on my nail better causing white, horizontal bruising. I try to spend the time filing my nails.
  5. Exfoliate your feet in the shower with a pumice stone, apply heavy moisturizer and socks before bed.
  6. Use one a lighter shade for quick, neat application.
  7. Eat healthy and take your vitamins! I have found that taking biotin and multi vitamins daily have greatly improved my nail health. Also, I noticed a HUGE improvement in my nail health when I stopped taking prescription acid reflux medicine.

 What are you favorite polish colors?

xo Miss Alyss

Glowing Skin All Year Long

Who doesn’t love a healthy summer glow? In the summer I like my makeup routine to be a little quicker and lighter. Once the cooler weather rolls in, my entire skincare routine takes a little longer. Achieving the perfect glow requires the the right combination of tanned skin, bronzer and shimmer. I look for light weight products with SPF and a touch of shimmer to give my skin a sun kissed look.

I am a big advocate of skin protection and always try my best to wear SPF. My biggest (and only) regret is having gone tanning for my high school Jr. Prom. I do not know what I was thinking! The following year my mom was diagnosed with basil cell skin cancer. Her diagnosis along with a little more wisdom made me realize that tanning is not safe or beneficial to my life. For the last 8 year or so, I have been much more careful in the sun. I wear SPF, sometimes a hat and try to limit my time sitting in the sun for no reason. My routine is not perfect and sometimes I do get a little sunburn (luckily I didn’t get 1 sunburn this year). Although I am conscience of the sun I do not hide from it. I like to get outside and enjoy the beautiful weather while I can. I just think it is important that everyone try their best to protect their skin on a regular basis. I definitely do not tan as well as I use to, but I am okay with that. The thought of developing wrinkles and/or skin cancer because I wanted darker skin for a few months is terrifying! I always say, “a tan will fade, wrinkles and skin cancer won’t!”

There are a lot of great self-tanning products on the market. I use at home sunless tanners and have used Mystic booths (check out my previous post). At home self-tanning definitely requires trial and error and usually a little patience.

I recently found the perfect combination of makeup products for glowing skin. This face routine is quick and leaves me with a pretty sun kissed look. After applying a light weight moisturizer and primer, I apply Clinique’s Moisture Surge CC Cream with my fingers. This product is so light and creamy. I love the way it feels and how it evens out my skin tone. I actually think this is going to be a great fall/winter product when my skin starts to lose moisture. Next, I apply Clinique’s True Bronze Pressed Powder in Sunkissed to my cheek bones, bridge of my nose, forehead and a touch on my jaw line. I have been using this bronzer for months and can’t get enough of it. Last, I apply Clinique’s Cheek Pop in Melon Pop to the apples of my cheeks. I also like this bronzer and blush combo over my BareMinerals Original foundation.

xo Miss Alyss

Self Tanning Routine

It is hard to believe Labor Day Weekend is upon us and the summer is coming to end! I also cannot believe I neglected my blog all summer, so I am starting fresh this fall and committing myself to a blog a week. Like many of you I want to hang on to my summer glow as long as possible. Here are some of my favorite tanning products of the summer. DO NOT forget to exfoliate before applying self tanner and to always keep your skin moisturized!

Mystic Tan
This May I decided to splurge a little on a Mystic tan for my cousin’s wedding. In prep for the wedding I got my 4th and 5th Mystic tans ever. I loved the results. Mystic definitely gave me the perfect glow and lasted a solid week. I highly recommend doing a practice run if you are planning on getting a Mystic spray before a special event, especially if you have never gotten a spray tan. Before your appointment be sure to shower and exfoliate. It is also a good idea to wash your hair. During the spray you wear a hair cap and your first shower after your spray should be a quick rinse.

image

The booth at my local Beach Bum Tanning salon was much newer than the one I used in the past. I have to admit it was also a little intimidating! For a second I thought I going to have a Ross Geller moment. Yes, you have to turn 3 times. Yes, the spray is startling. Yes, it is a little claustrophobic. However, it is totally worth it! The Mystic spray is ultra fine, has a light scent and dries fast. The tan develops over an 8 hour time frame. I asked for the medium shade and let it develop over night for about 8 hours.

VS Tanning Spray
Early in the summer I purchased the Victoria Secret Self Tanning spray and was pleasantly surprised with the results. The mist is not as fine as a Mystic spray, so I did have to rub it in to blend. I started with at my feet and worked my way up each leg then washed my hands before moving on to my upper body. I thought the color was great; golden tan (not orange) and no streaks! Unfortunately, this product is only sold in the summer months.

VS Bronzing Lotion
The Victoria Secret bronzing lotion is great! This product gives you a pretty glow that washes off in the shower. It is the perfect finishing touch to your self tanning routine or when you just want a quick added glow. I used this lotion on top of my Mystic tan the day of my cousin’s wedding. Like the VS self tanning spray, this lotion is only available in the summer.

BM Faux Glow Face
BareMinerals Faux Glow (for face) tanner gives you a very subtle, buildable glow. The BM consultant I purchased this from instructed me to apply this product before my moisturizer. Sometimes I let my first application dry and apply a second. I have used this face tanner throughout the summer and will continue to use it into the fall. My favorite thing about this tanner is that it does not make me breakout!

What are your favorite self tanning products?

XO Miss Alyss