Soup is a great dinner for chilly nights, but not all of us have time to let a pot simmer on a stove for hours. While I’m sure this soup would work great in a slow cooker too, I actually didn’t have one at the time. If you don’t have a slow cooker either, you can still whip up this tasty soup in 30 minutes, making it perfect for weeknights.
Ingredients
4 cups of unsalted chicken broth
2-3 cups of cooked chicken
2 14.5oz cans of petite diced tomatoes
1 14.5 oz can of cannelloni beans, rinsed
1/4 cup of pec Romano
1 small yellow onion, finely chopped
6oz fresh spinach
2 cloves of garlic, minced
1/4 tsp black pepper
Sprinkle of dried parsley and oregano
Directions
Saute the onion in about 2 TBSP of extra virgin olive oil over medium heat until they’re translucent, about 5 minutes.
Add garlic and cook for 3-5 minutes then add chicken broth and tomatoes (with juice) and bring to a boil.
Add cannelloni beans and cook for 3-5 minutes.
Add chicken (I used a rotisserie chicken which is a huge time saver), black pepper, oregano and parsley. I did not add salt because one can of tomatoes I used had sea salt in it.
Let soup boil for 10 minutes then turn down heat. Add cheese and spinach, cooking for about 5 minutes.
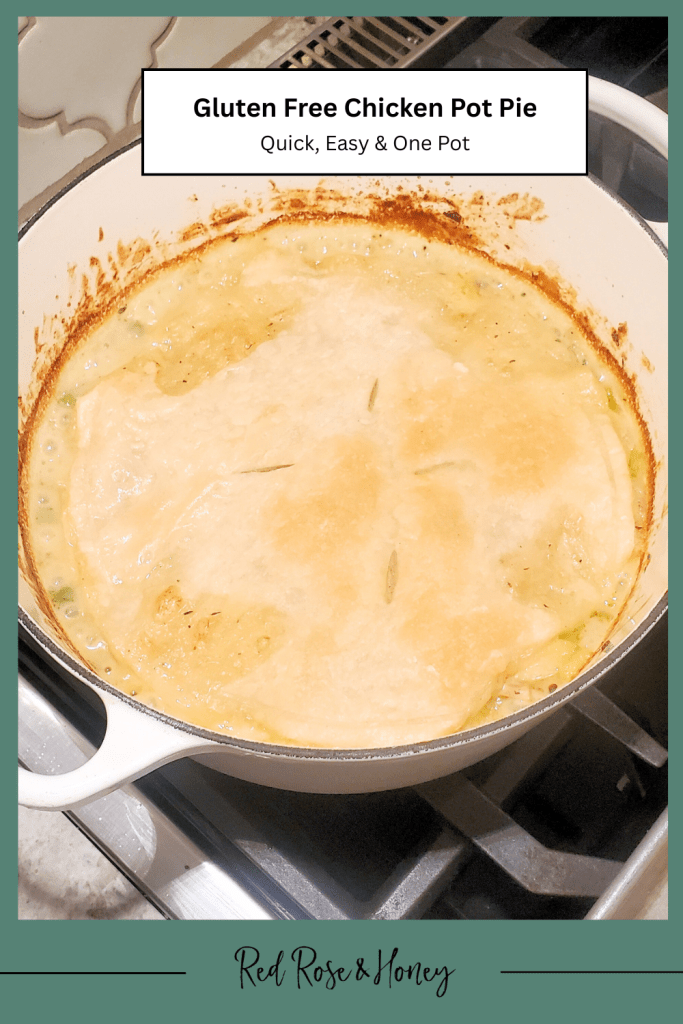
Are you looking for an easy gluten-free dinner? You’ve come to the right place! In this post, I share one of my favorite one-pot comfort dinners – chicken pot pie. I have recreated this childhood favorite totally from scratch and completely gluten-free.
My mom’s chicken pot pies were one of my favorite dinners before my gluten-free life. In college, she would send me back to school with personal size pot pies to keep in my freezer. They quickly became one of friends favorites too! It is probably the only recipe she hasn’t converted to be gluten-free. As a result, it has been a long time since I’ve enjoyed this meal….until now.
I did a little research on chicken pot pie recipes to better understand how to make one from scratch. My main goal was to make sure it turned out as delicious as my mom’s. From my research I learned a Bechamel sauce would be a key player in the perfect consistency. It’s a white sauce made from butter, flour, and milk or cream. It is common in meals that have a thick, creamy consistency. I am so proud of how this recipe turned out. I didn’t just like this dinner; I loved it! I felt like I could have sat at the table all night eating. I was also used just one pot for this whole meal — my beloved Le Creuset Dutch oven.
You can put this dinner together in about an hour if you use a rotisserie chicken. It also works if you have already roasted a chicken yourself. Lucky for me, I made my first roast chicken a few days before attempting this pot pie.
Tips:
Use rotisserie chicken to save time
Make it a one pot meal by using an oven-safe dutch oven (shop affiliate link: Le Creuset Dutch Oven)
Substitutes:
Any type of chicken should work – rotisserie, roast chicken or diced cooked chicken breast
Swap out the veggies listed in the recipe for mixed frozen veggies
Add diced zucchini for extra veggies without altering the taste. Note: Excess water from large zucchini may change the consistency of the filling, so opt for smaller zucchini if possible.
In a pinch, I have swapped out heavy cream for light cream or whole milk
Swap the Bisquick biscuit topping for a gluten-free puff pastry like Sweet Loren’s
2 TBSP Gluten-Free Flour (I like Bob’s Redmill 1-to-1 GF Flour)
8oz. Unsalted Chicken Stock
2 C Cooked Chicken
3.6 C Frozen Mixed Veggies
Topping (Recipe is Bisquick’s)
2 TBSP Unsalted Butter, Melted
3/4 C Gluten-Free Bisquick
1/2 C Almond Milk
1 Egg
Directions
Pre-heat oven to 350 degrees
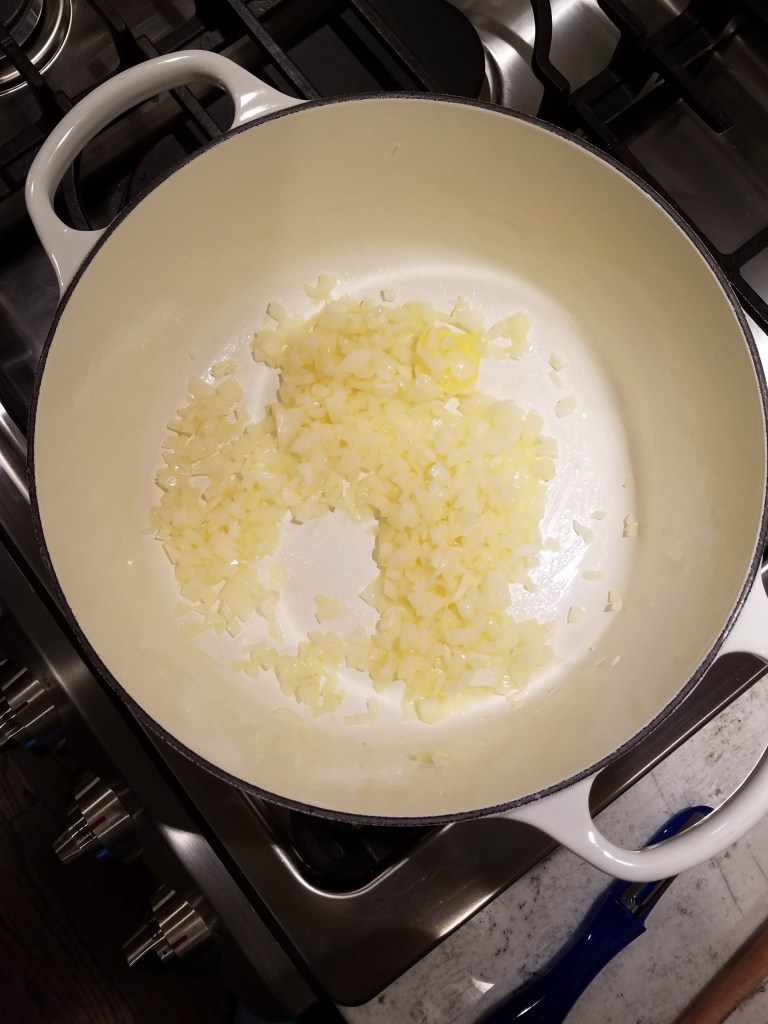
Melt butter in Dutch oven then add chopped onions and cook until softened.
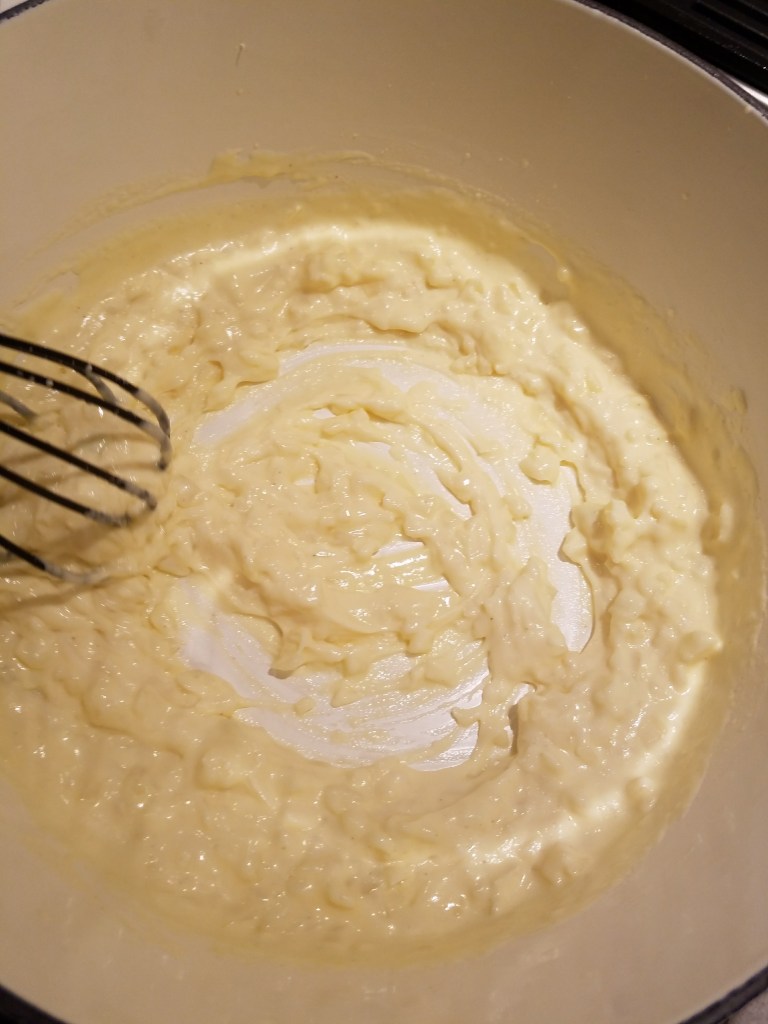
Whisk in flour then heavy cream. Continue to whisk constantly until mixture thickens then add black pepper, salt and thyme.
-Add chicken stock and bring to a boil then turn heat to low.
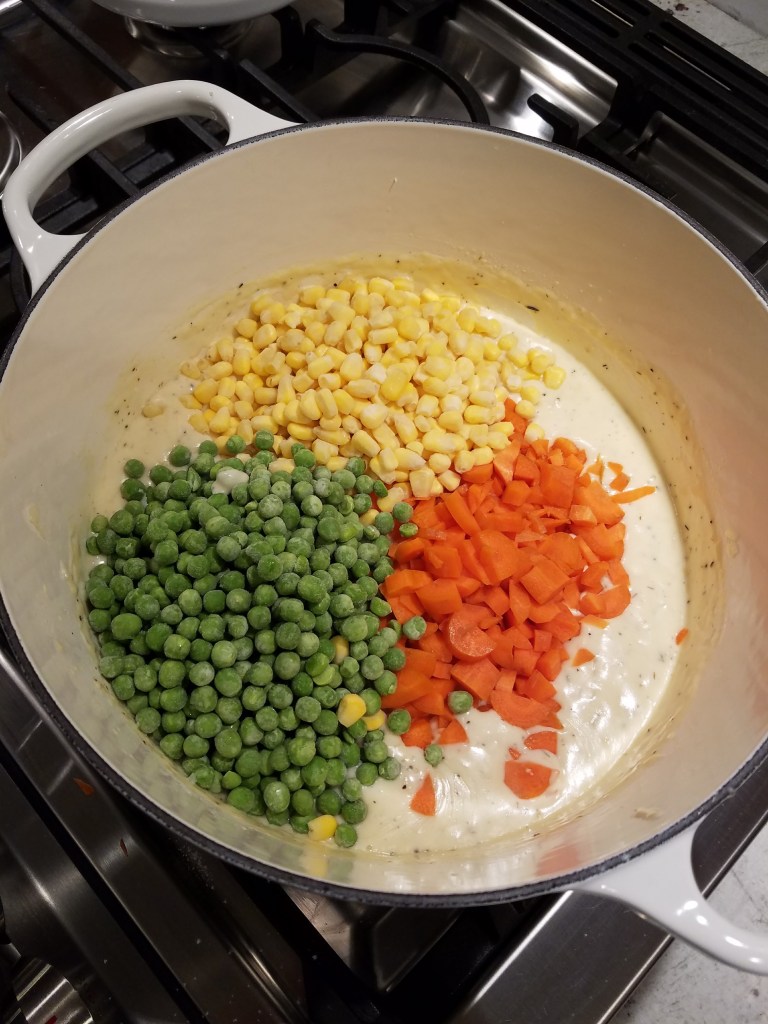
-Add veggies and cook until softened, about 10 minutes.
-Add chicken and Mix well then turn off heat.
-Prepare biscuit topping following the Bisquick recipe. Place spoon fulls of the batter around the Dutch oven.
Cook in the oven for 30 minutes or until topping is golden.
Add an additional sprinkle of thyme and/or parsley if desired.
Notes
Rotisserie chicken is a HUGE time saver!
Frozen or fresh mixed veggies will work. If you use fresh veggies, just remember to dice them small and extend the stove top cooking time, so the veggies have time to soften.
Like this post? Check out these posts for more gluten-free recipes!
These gluten-free caramelized onion and Gruyère burgers are juicy, flavorful, and easy to make. A simple, family-friendly burger recipe perfect for weeknights
After many attempted recipes, I think I finally found the best use for this common kitchen appliance – pulled chicken! It’s a great base for a variety of seasonings and marinades. Now that I have figured that out, the slow cooker is my go-to for work week lunch meal prep. I have been making pulled…
Hi friends! Today I am sharing one of my all time favorite recipes – Buffalo Chicken Burgers. This recipe is easy and can be made right in your kitchen; no BBQ grill needed. In fact, I think this recipe actually comes out better on the stove top than the grill. The consistency of a chicken…
As the cool weather sets in, I have been itching to make some cozy dinners. Most days of the week I find myself sticking to the same dinner dishes, but I like to try to add a new meal to my repertoire at least once a week. On a normal weekday, I am out of the house for close to 10 hours and often don’t get home before 6:00. A busy work week makes cooking experimentation difficult!
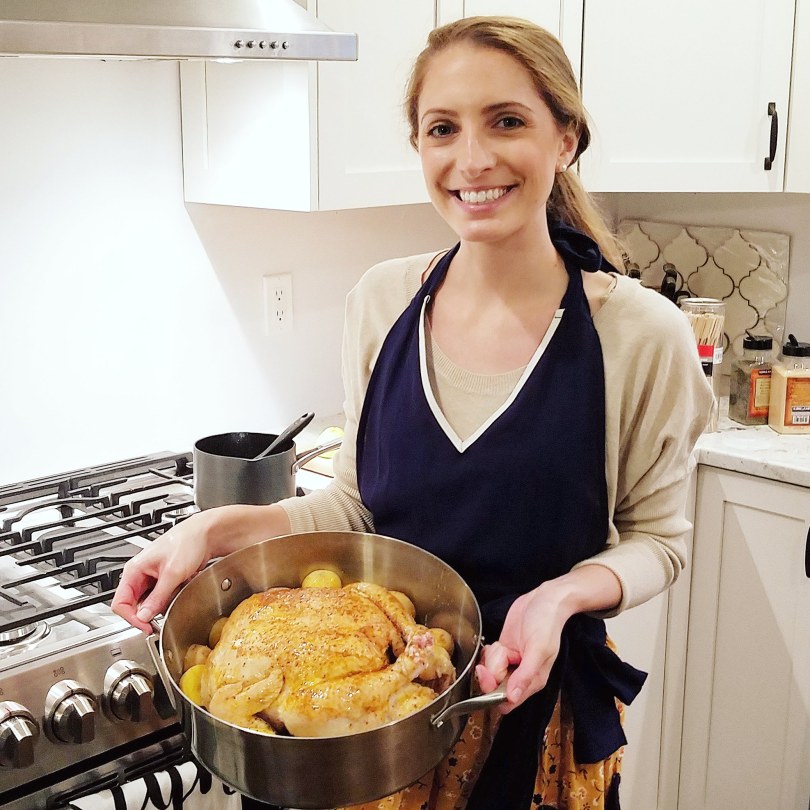
One of my favorite weekend rituals is spending mornings watching The Food Network and The Cooking Channel. I personally find it comforting to have cooking shows on in the background as I drink coffee and attend to other household chores. One of my favorite chefs to watch and learn from is Ina Garten. I have seen her “Roast Chicken” episode a few times and I finally decided to give her recipe a try.
Although I don’t think I could make this as a weeknight meal because of the extended cook time, I think it is a great dinner option for the weekend. Minimal time is needed for preparing the chicken, and following the recipe is fairly easy. My major recommendation is to make sure to generously season the chicken {about 7 lbs} and roast it for about 2 hours to least 165 degrees.
Whenever I prepare raw chicken, I wash and put away any other dishes in the sink or on the counters to spare them from contamination. I also use a separate cutting board strictly for raw chicken. After I put the chicken in the oven, I focus my attention to cleaning the countertops. Although I have heard mixed reviews about using diluted white vinegar for cleaning granite counters, I have not had any problems. I mainly use Method brand cleaning products for cleaning the kitchen, but cleaning while cooking raw chicken is an exception.
I have a Samsung slide-in oven which has a convection roast setting. I pre-heated the oven to 425 degrees. Don’t forget to adjust your racks before your preheat your oven. First, I cut a lemon into quarters, followed by cutting an onion into thick slices and lastly cutting the potatoes into halves. To prepare the chicken I removed the innards {didn’t know they would be in a bag – how nice!}. Next, I rinsed the chicken under cool water and patted it dry. I then seasoned the cavity with salt, black pepper, Herb de Provence, fresh garlic cloves, onion and lemon wedges.
Unfortunately, as soon as I was ready to put the chicken in the oven, I realized I didn’t have kitchen twine. {Was I supposed to register for that for my bridal shower?} Twine is important because it helps the chicken cook evenly and prevents the legs from burning. I opted for dental floss {sorry, mom} and it worked out fine. It’s also important to prevent the wings from burning. I could have tucked the wings under the body of the chicken, but they seemed pretty snug as they were.
I have a roasting pan, but I opted for my wide Calphalon Dutch oven. I placed the potatoes and onions at the bottom of the pan. Looking back, I could have also added carrots and celery. I tied the legs with “twine” I placed the chicken on top of the vegetables {this helps the air circulate around the chicken}. I seasoned the outside of the chicken with salt, pepper, garlic powder, paprika and basted it with melted butter.
I am happy and equally proud to check this recipe off my “to-try” list. I will definitely be making it again. Check back soon to see what yummy meal I made with the leftovers!